Currency
Architecture Photography incorporating a European City Break By Les Forrester
08/Aug/2022
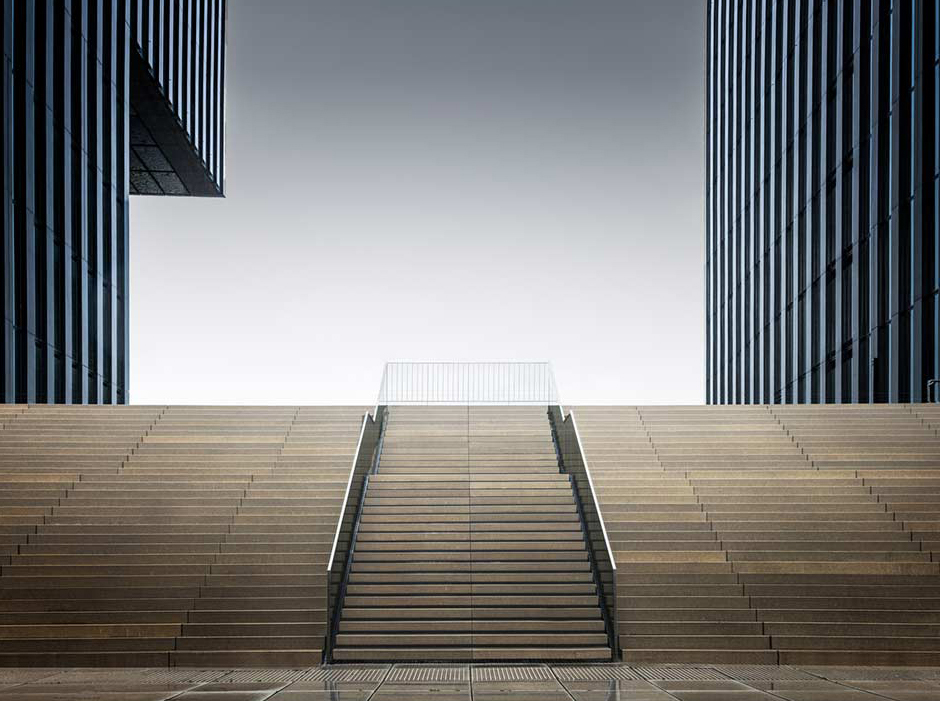

My passion is architectural photography with the majority of my work carried out in various European cities, usually combined with a city break. I live in the picturesque Yorkshire Dales. With a passion for travel and photography, over recent years I have successfully managed to combine the two and therefore want to share how you can enjoy a city break whilst photographing its architecture.

Planning the trip
Usually I will plan four days in my chosen city but photography wouldn’t be all day every day otherwise I’d be exhausted after day one. I have to remind myself it’s also a holiday thereby taking time to relax and enjoy what the city has to offer me. I start researching my city break months ahead of a planned trip I as find its an important prerequisite. Thorough research of a city and its architecture enables me to maximise opportunities thereby allowing me to get more out of both the photography and enjoyment of the city. Normally I already have a list of various cities I’d like to visit with a few architectural opportunities listed but I need to refine these since it might be for a project I’m working on or it might be its culture and the cuisine that also interests me. Once I’ve chosen the city I’ll usually have three of four buildings already earmarked that I’ve gathered from previous months of research. Each time I come across a potential building I’ll save it, slowly building this up to a core of three to four buildings I require to make a trip viable. It’s then a matter of researching a city to hopefully identify other possibilities. There are lots of resources via the Internet where most cities have a dedicated city guide, architecture tours and lots more information that assist me. Once I find anything of interest I look at their own website as most buildings if they are public will have a website so I can ascertain their location, nearest transport links and whether photography is allowed. I also need to consider whether permission is needed for both exterior and interior shots. I have found most European cities have a relaxed approach to photography of an architectural nature but it is always advisable to check.

I mentioned earlier that my trips are around four days but I tailor that depending on what potentially a city has to offer in terms of photography and culture etc. It’s about pacing yourself as if I’ve chosen six buildings but three are on one side of the city, two on another and one a little further away, I’ll break these into three separate days. This leaves the fourth day to revisit one or two if the prevailing weather conditions haven’t been in my favour or I might have the images I wanted and spend that last day as a tourist.
What camera and lens do I use?
| When photographing architecture I don’t use any complicated equipment i.e. like a tilt and shift lens, my kit contains the following lenses, 16-35mm, 24-70mm and sometimes a 70-200mm along with two mirror less full frame cameras, I always have a back up camera just in case. Other kit I take is a lightweight travel tripod and probably a set of ND magnetic circular filters. Above I mentioned a tripod but I don’t always use one. Interior shots are handheld because it’s rare you’ll be allowed a tripod inside a building. Although I don’t use tilt and shit lenses I like to make sure both the verticals and horizontals are straight the tip is shoot a little wider than I need then with Adobe Lightroom I can use the transform section to help with the symmetry, they may require another small adjustment in Adobe Photoshop. The conclusion of my trips, once I have edited my work, is to print a selection of images as I personally find the process isn’t complete until I’ve produced the prints. |  |
It's not finished until it is printed
 |
Fotospeed has wide range of papers both in sizes and mediums, which suit the look I’m after. I print my own work on a variety of papers depending on the image; I believe it is the image that chooses the paper not the photographer. I use a Matt paper for lighter toned images. Fotospeed Platinum Baryta 300 paper for darker monochrome or colour-saturated images. Fotospeed always have a paper that fits the style and look I’m after but if I’m unsure of which to use then I’ll use one of Fotospeed's test packs before making the final decision of a larger format paper. |
Personally I’m not sure there’s a better feeling than of holding a print of my work. I find it more satisfying than seeing it on a screen and with Fotospeed I’m assured my print will last many for years to come. I hope this blog post has helped you to understand my perspective. It’s meant as a guide to help you think about a city break where shooting architecture can be just as much fun as printing your work.
Fotospeed are there to help you. Don't forget the subscribe to the Fotospeed Newletter here to keep up to date with all the news from Fotospeed. Also don't forget to watch and subcribe to the Fotospeed YouTube channel here.
You can find more of Les's work here; www.lesforrester.com