Currency
Why customising your colour profiles is the most important part of your workflow
Categories:
Colour Management
03/Aug/2022

Colour calibration, as you might know, is an integral step in creating perfect photos from shoot, to screen, to print. Those serious about photography will be familiar with the processes by which colour management takes place, and most photographers worth their salt will spend time ensuring that their shots come out accurate and as true to life as possible. However, if you’re new to the process, you might need a little help knowing where to start.
Background: what is a profile?
In digital imaging, a profile is a correction or adjustment file which analyses how an output device – whether that’s a screen or printer – is interpreting the colours in your shot. It then adjusts them to meet the universal standard set by the International Color Consortium (ICC). A profile helps you maintain accurate and lifelike colour in both display and print.
Below is a quick run through of the steps necessary to colour manage your photos, as well as an explanation as to why customising your colour profiles during printing is possibly the most important step in achieving great results.

Controlling colour capture
The first step to getting an accurate print starts when you’re shooting. Using a colour chart during capture will help you get accurate colours and save you lots of time in post-production. The basic practice is to create a custom white balance by using a neutral reference target – this goes beyond setting the white balance in camera. Products like the Datacolor SpyderCUBE help you to manage colour by balancing light. However, white balance is just the first step in getting accurate colour – using a 24 patch colour chart checker in your first shot is the next. Adding this one simple step to your workflow can easily transform your photographs and minimise the time and effort needed to get a fantastic shot.
Accurate on screen colour
Imagine the wasted time creating a fantastic image, only to find that your on-screen colour was off when you come to print. Colour managing your monitor is a great way to avoid this and ensure accuracy in your display and prints. The quality of your display degrades over time, so regularly calibrating and profiling your monitor will help ensure that the colours you shot are the colours you see on screen. There are a range of products to help you do this – investing in a monitor hood is a good place to start. There are also products available – such as the Datacolor Spyder5ELITE – that ensure accurate colour on your monitor. This is achieved by hanging a hardware device over your screen while it displays several sets of colour generated by accompanying profiling software. The device then measures your monitor’s colour and using this information, the software creates a profile based on these results, and adjusts the colours accordingly.
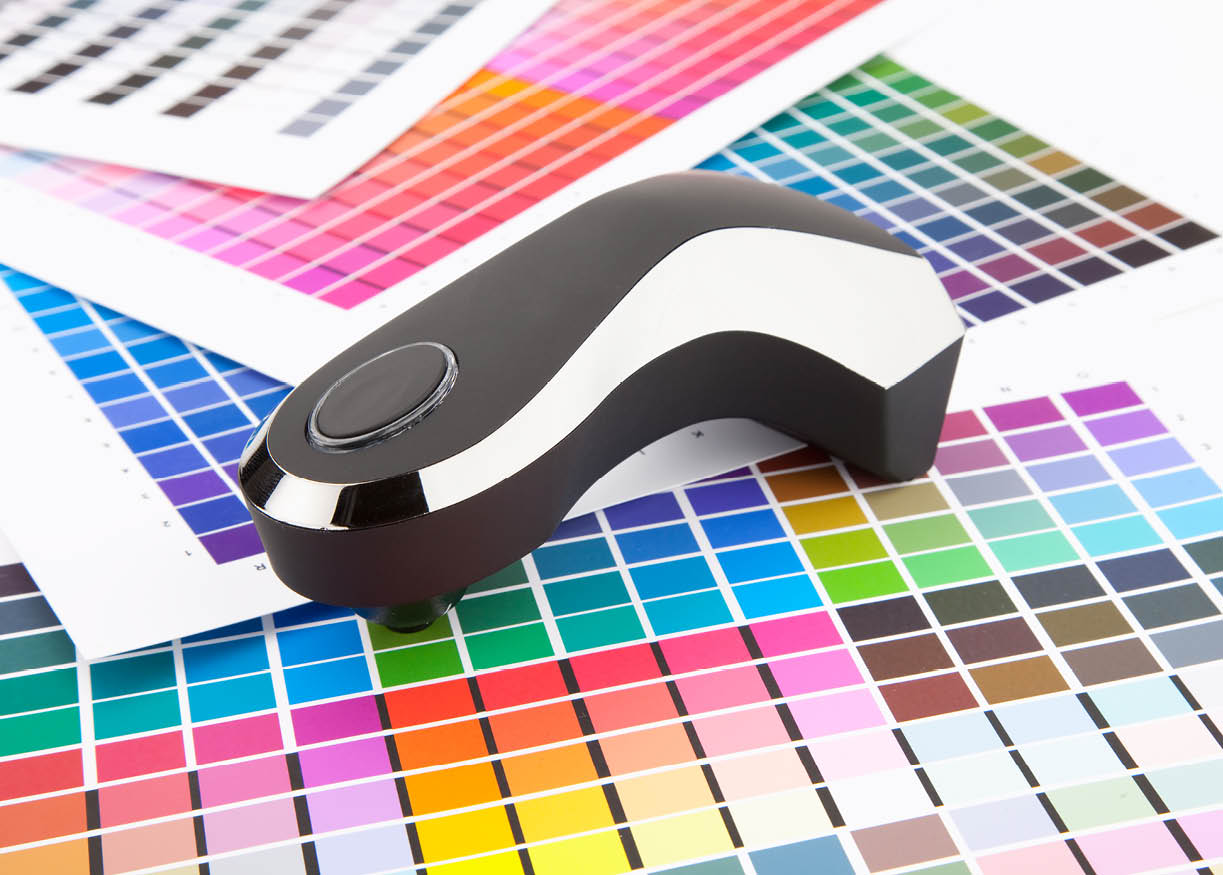
However, all of these steps will be wasted effort if you don’t take action to colour manage in the printing process. Surprisingly, this actually has nothing to do with colour managing your printer – it’s more about how your ink and paper work together. Simply put, it’s achieved by a similar process as monitor calibration, except in this instance, a device reads the colours off a printed test chart rather than your screen. Again, software then generates a profile for your printer which you must select when you go to print.
Colour managing printers is usually done in one of two ways: generic profiling, or custom profiling. Generic profiles are a great way to get close results quickly – they’re easily downloadable from your paper manufacturer’s website, and can be selected based on your ink and printer. Generally, they’re fit for purpose and are usually pretty good. Fotospeed supply these with all the papers we sell. However, generic profiles do have their limitations; they’re not created for your specific printer, and have no way of knowing how your printer is performing on any given day.
If it’s incredible – rather than just good – results you’re after, a custom ICC profile is a must. These work in the same way as generic profiles, but with one huge exception – they’re created with your specific printer, paper, and ink combination in mind. If you choose to have a custom profile built, the likelihood is that you will see a significant improvement in colour integrity and tonal range.
You can do this either by purchasing your own colour management equipment, or by sending your paper and print away to be profiled. At Fotospeed, we offer custom ICC profiling, completely free of charge, for all our papers. To take advantage of this service and get great print results, all you have to do is print off a test chart and send it to us. We will then read your chart using a spectrophotometer to generate your unique custom profile, and send it out to you the very same day.
For more information, click here.
If you would like to stay on top of all the latest information from Fotospeed don't forget to sign up to our Newsletter