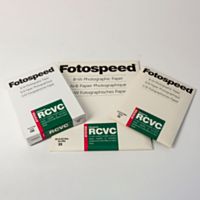
3 Tips to Create Black and White Prints that Really Impress

In some ways, it can be more difficult to create black and white prints than it can be to create colour prints. One reason is that colour is often considered a significant part of the story-telling process in photography. However, it isn’t impossible to create black and white prints that really are as impressive – if not more so – than the same prints in colour.
In fact, once you’ve got your amazing shot, with perfect composition and framing, there are just three things you have to do during the printing process to ensure that your black and white print is picture perfect. It’s really as simple as knowing these three Ps: prep, paper, and printer.

1. Preparing your print
As any good photographer knows, colour calibration is a key preparatory step to creating a good print. But, believe it or not, colour calibration isn’t just for colour shots – it’s also crucial to do when you create black and white prints. If your monitor and paper/printer combinatiopn are correctly calibrated, what you see on the screen when you edit will be what you see on your print when you’re done.
With black and white, calibration isn’t just critical for colour accuracy, like it is in colour shots. Having a properly calibrated system means that you’ll be able to better see the details, the different shades of grey, in your black and white photograph. If your monitor is too bright, you won’t see all the highlight detail. If your monitor is too dark, you will lose the shadow detail. Either one of these is a disaster for a good quality black and white print.
To test you monitor and printer calibration, find a black and white test image online and print it out. See if you can accurately see all the shades of black, grey, and white on your print and on your monitor. If you can’t – they need calibrating. Using a colorimeter to calibrate your monitor and getting the right ICC Profile for your printer will help you create black and white prints by making sure that the details you see when you edit are the details you see in your print. At Fotospeed, we recommend the Datacolor Spyder5EXPRESS or the Spyder5Pro to calibrate your monitor, as they offer accurate results, meaning you’ll see all the details on your monitor. We also offer free custom ICC profiling for all our papers which tailor your printer’s profile to your specific printer/ink/paper combo. This will help you improve your tonal range when you come to print – pulling out all those details needed for a great black and white print.
2. Picking your paper
As always, choosing the right paper for your print is a personal choice, one that depends on the particular person, the particular photo, the particular use and so forth. However, to help you create black and white prints that really pop, there are a few things you might need to consider. The first is the paper’s DMAX. This is essentially the deepest tone of black available to your paper/printer/ink combination. Your paper’s DMAX is usually also linked to its finish. Because matte papers absorb more ink, glossy papers tend to have a higher DMAX (2.0 and above), meaning that they will present deeper blacks and finer detail. Our Platinum Baryta 300 Signature offers a DMAX of 2.7, meaning that the darkest shadows and most delicate highlights will all be present in your print.

However, matte paper is often a popular choice for black and white photos, because it gives better visibility in different lights. If do want to use a matte paper, a DMAX of about 1.7 and above is high enough to give you great results and a good level of detail. Fine art matt paper Platinum Matt 280 offers both a wide colour gamut and a high DMAX, meaning that not only is it great for colour photographs, but you’ll also get the most out of it in your black and white shots too. It is also important to remember that there is more than one shade of white when it comes to paper, and this will affect the outcome of your print. Pay careful attention to the tone of your paper – is it a warmer paper, offering a slight sepia effect, or a cooler, blueish paper? Remember, fine art papers are colour neutral, so using them means you’ll have more control over your black and white print, whether you’re looking for more accurate colour, or prefer to tint or tone your image yourself in the editing process.
3. The perfect printer
Your printer also plays a significant role when you create great black and white prints. Many people end up disappointed when they use their standard colour printer to create black and white prints because standard CMYK colour printers often aren’t able to produce a neutral grey, showing uneven gradients and colour casts in your print. This means you might have a magenta or green tinge in the grey spaces between your black and white.
If you’re serious about black and white photography, you might want to look at using a printer with more inks, a wider colour gamut, and a higher DMAX.
Epson, for example, have developed their UltraChrome HD ink range with a ‘Photo Black’ ink that has a pigment concentration 1.5x higher than previous inks. This provides more accurate colours, deeper blacks, and smoother tonal gradation – all of which is very useful for creating a great black and white print with lots of detail. You can check out some of the Epson printers that accommodate UltraChrome HD inks on the Fotospeed website, including the Epson SureColour P600 and the Epson SureColour SC-P800. Investing in a printer that uses a wider range of ink colours will give you more detail in light and dark areas, reduce unwanted colour casts, and help you create a powerful black and white print.

IT DOESN’T HAVE TO BE DIFFICULT TO CREATE BLACK AND WHITE PRINTS THAT TRULY IMPRESS – IN FACT, REMEMBERING THESE THREE TIPS IS A SIMPLE WAY TO MAKE SURE THAT YOUR PRINTS POP IN ALL THE RIGHT PLACES. FOR MORE PHOTOGRAPHY ADVICE, CHECK OUT OUR TECHNICAL SUPPORT PAGE, OR GET IN TOUCH TO FIND OUT MORE ABOUT THE PRODUCTS FEATURED.
If you would like to stay on top of all the latest information from Fotospeed don't forget to sign up to our Newsletter.


