Currency


Painting Light with Tony Worobiec Part 2
30/Nov/2021

1) Introduction. In Part 1, I suggested that quite subtle things can be done using torches and lights, but in this blog I am hoping to appeal to your more "creative" side. The best way to explain this technique is to view your light source rather like a brush, where you can introduce quite dramatic effects. Effectively your selected location is the "canvas" to which you are able to add whatever you wish. If you intend to light-paint manually, (as most of us do), then sweeping curves are much easier to introduce, rather than "painting" straight lines. You could of course attach your lights to a bicycle and simply ride by in order to create light-trails. Needless-to-say in all the techniques I am about to discuss, my camera was attached to a tripod.

2) Consider the subtle. Whilst light-painting can be very showy, there is no reason why you cannot also be very subtle. This shot was taken in my local forest, and as you can see from the star-trails, it was a fairly lengthy exposure. During the exposure, I had plenty of time to tie a piece of string to the small hand-torch, walk into frame and then perform four separate "swings". Because I was wearing dark clothing, I do not appear in the picture. Inevitably when doing something like this, you will have unwanted light-trail elements, but any superfluous light "debris" can be removed using the Clone Tool in Photoshop.

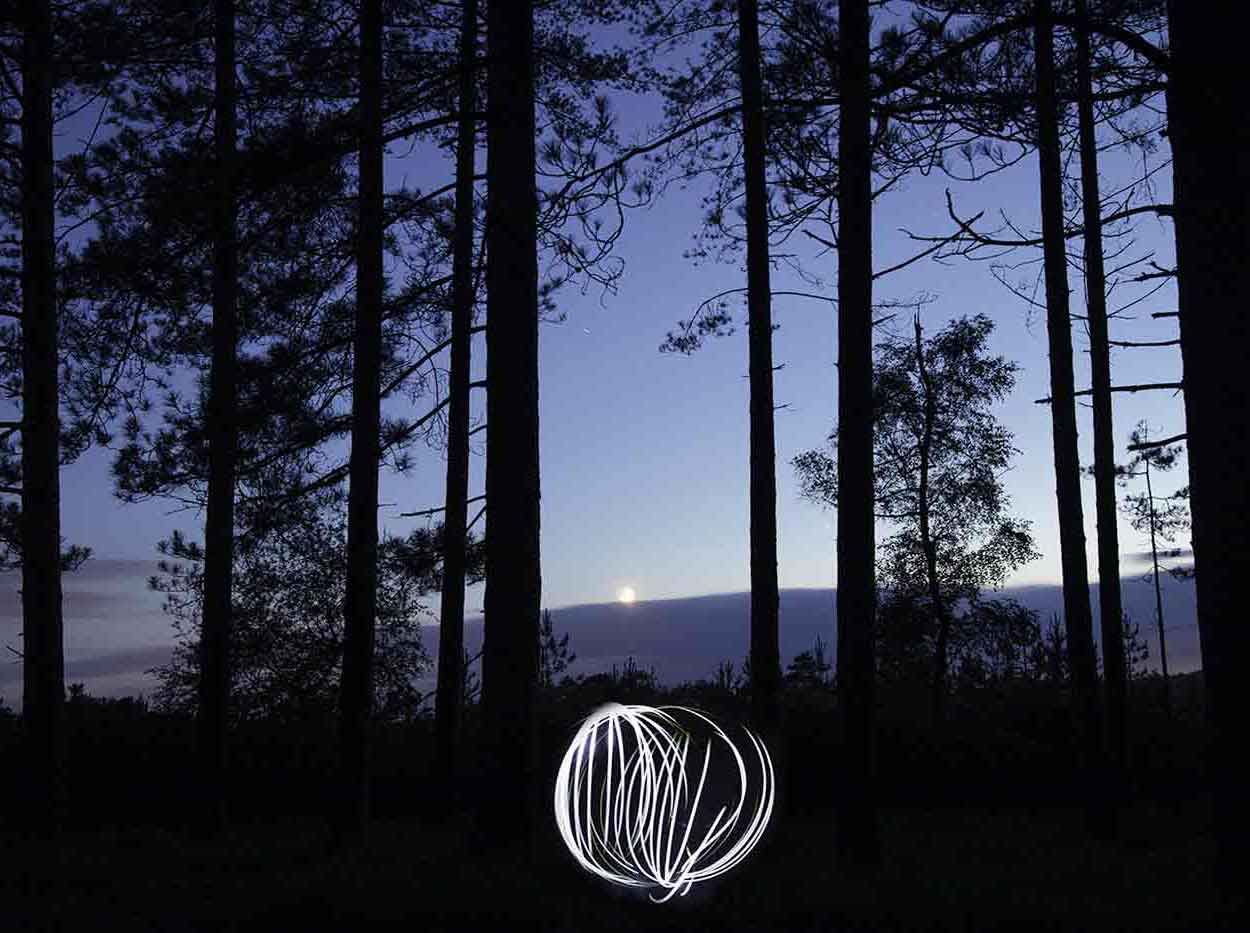
3) How to produce a light-globe. This is another shot I took in my local forest. The moon was setting so I wanted to create a "light sculpture" as a visual metaphor. Once again I used a simple hand-torch attached to a piece of string. The length needn't be any longer than three feet. Typically, an exposure for a shot like this takes between 30 seconds and 1 minute, which gives you plenty of time to set-off your camera and then take a position directly in front of it. With your back to the camera switch on your torch and start vigorously swinging it whilst slowly pivoting on one of your heels. As you slowly swivel round, try and keep the swings as regular as possible. Ideally, finish the procedure with your back facing the camera.

4) Creating a tri-color effect. Ulanzi Lights are designed to be locked together, so it is easy to create a tri-color effect. In this example I have used three lights, one set to yellow, one set to white and a third set to blue. Producing this effect was very easy. Once I set-off the camera I quickly ran to the right of the camera's view, and whilst holding the locked Ulanzi units I swung my arm in a circular fashion whilst slowly walking from right to left across the picture frame. If you keep your arm as straight as possible, you will be able to create a very regular pattern. Just one little hint, before you start just check out that the land is relatively flat, or you could find yourself tripping on a rabbit hole as you exercise your manoeuvre.


5) Swinging with both arms. This is another very easy technique you may wish to try. This shot was taken with Corfe Castle in the background. Normally it isn't illuminated except over the Christmas period, but lit in this fashion it does make it an excellent location. In this example I have an Ulanzi light in each hand, one set to green whilst the other one is set to purple; I deliberately selected colours that were different to the illuminated ruin in the distance. Similar to the last technique, I quickly moved to the right of the picture frame , and made sure I was out of frame. With my back turned to the camera I switched on both lights, turned round and moved both my arms in a circular fashion as I walked slowly, but steadily across the picture frame. Try to time it so that you finish the manoeuvre out of frame.
6) Be imaginative, be abstract. This image has been created using a light-wand, the sort of thing that can be bought on-line. The joy of this is that you can change colours literally as you are sweeping it in front of your camera. The location is Kimmeridge Bay in Dorset; there is an abandoned pill-box on the beach which makes an ideal foil for this kind of work. Note incidentally that the sky has completely filled-in, but that shouldn't be a barrier to doing light-painting. Once the camera had been set-off, I walked backwards facing the camera, whilst making extravagant sweeping gestures with the light-wand. I had time to walk behind the pill-box and reappear on the other side. As I suggested in my previous blog, this is a genre that celebrates the accidental, so don't try to over-control the effects.

7) Develop your own "Tag". Rather like a graffiti artist, with a bit of experimentation you will begin to develop a style that is unique to you. This is a technique I especially enjoy. With a different coloured Ulanzi light in each hand, I set off the exposure and quickly move away from the camera. With my back turned to the camera , I switch on both lights and swing both using a rotation movement whilst walking directly towards the camera. Do remember, you are not a machine, so there will always be an element of imperfection, but that adds to the charm of the image. The only challenging part of this technique is ensuring that your shutter time is sufficiently lengthy to allow you to complete the manoeuvre; generally I find 30 seconds is sufficient.
To see more of Tony's work please visit his website at https://www.tonyworobiec.com/
Tony also gives talks on his work and his experiences with print using Fotospeed Papers.
Enjoyed this content? Sign up to our newsletter for more tips and photography insights!