How to make your own calendar

-->
Creating a calendar is the ideal opportunity for a photographer to showcase a wide range of pictures they’ve taken. No matter what style of photography you specialise in, a calendar is the type of project that can really show off your creativity. They also work perfectly as a Christmas gift, so if you have anyone special you want to give a personalised gift to, read on.
A good thing about making a calendar is you have complete control over what goes into it. It can be your design; from the style of paper used to the pictures you put on them. The first part of creating a calendar is selection. This runs a lot deeper than just selecting images. Should it be landscape or portrait? Should I have a theme? Should I add a small description to the image or let the images speak for themselves?
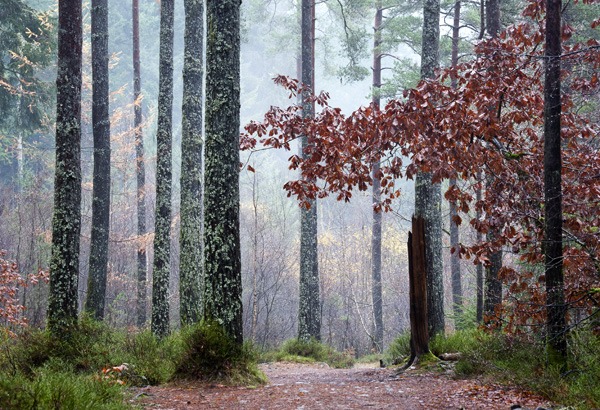
Once you’ve decided on the above, then you can start looking at what images you’re going to use. As a photographer, you’ve probably taken thousands of photos in your time. Cutting that down to 12 is no easy task, so it’s important to remember what you want your calendar to show. If you’ve chosen a theme - for example, landscape photography - a good rule of thumb is to fit the pictures in with the months or seasons. December/January, for example, could be a picture of a snowy hill, whilst July/August could be a hot location.
Image: Chris Palmer
Once you’ve decided on your images and what month they fit with, it’s time to edit your images. You may not want to edit your images or may have already done this, but it’s important to remember that each image should be the correct size, so they fit and flow on the calendar perfectly. You can do this in any editing programme; i.e., Lightroom, Photoshop, Ultimate 2020.
Next, it’s time to decide what paper you’re going to use. The best paper for calendars is High White Smooth from our Fine Art range and Matt DUO from our Photo Quality range. . This is due to the fact that it not only makes your prints look good, but you can also write on it. It’s important to remember that this isn’t an ordinary print - you’re creating something that has a purpose, so paper choice is vital. You may find that your calendar works on the paper you’re used to using, which is completely fine. 
Image: Peter Brisley
If you do decide to use a new paper, it’s vital that you test the images first. Your images may not work on certain types of paper, so before you send your calendar to print, you want to make sure it’s going to turn out okay. It’s important to also scatter proof your images. This will ensure that all of your images are the correct colour and should look how they’re supposed to when printed.
Once all of your images are edited and tested, it’s time to start designing your actual calendar. Photoshop is a good tool to create your design, however any design programme will suffice. The first thing to do is to design a front page. This can be anything from a funky design to an image to a multitude of images. Make sure the front cover contains images that are in the calendar, as that’s what the person picking it up will be expecting inside.
Image: Charlie Waite
Next, it’s time to start adding the dates to each month. You can add these any way you wish but it’s good to research other calendars for inspiration. Remember, keep your image in mind when doing this. It’s good to keep a consistent design flow throughout the calendar so that each time you turn the page, it’s easy on the eye.
Finally, it’s time for your back cover. Dependent on what you’re using the calendar for, this is optional. It’s a good chance however, to show whoever is viewing the calendar what images are inside. It’s also a good chance to add extra information, such as information about the images used, why these images were used, or maybe even a bit more about you, the photographer.
Image: Faye Yerbury
Once you’ve done all of the above and put it all together, it’s time to print your calendar. On average, you’ll need around 14 pieces of paper per calendar (front page, back page, 12 months), however, a good tip is to print double-sided. This way, you’ll save time, money and resources. Check out High White Smooth Lite DUO or Matt DUO as paper options for this.
Once all is ready and you’re happy with the prints, now is the time to put it all together. We’d recommend doing this at home with a laminating machine and a binding machine, if the resources are available to you. If not, you’re sure to find somewhere that would happily laminate and bind them for you for a small fee.
Check out more of our blogs here and sign up to our Newsletter here.


